
What Is WordPress and How to Install It?
WordPress is an open-source content management system used to build websites. Installation requires a hosting environment, PHP, and a MySQL database for optimal performance.

Establishing a secure and highly performant web presence requires a clear understanding of the architectural underpinnings of your chosen platform. For enterprises and growing businesses, selecting a content management system dictates long-term scalability, maintenance overhead, and search visibility. What Is WordPress and How to Install It? represents a fundamental query for organizations aiming to control their digital footprint. This technical guide delivers an exhaustive architectural breakdown of the WordPress core ecosystem, evaluates the operational differences between hosting models, and provides structured, step-by-step installation instructions. Designed for technical decision-makers and system administrators, this analysis covers hosting prerequisites, manual database configurations, and essential post-installation protocols to ensure an optimized, enterprise-grade deployment.
Understanding WordPress: The Leading Content Management System
The Definition of an Open-Source CMS
A Content Management System (CMS) is a software application designed to create, manage, and modify digital content without requiring manual HTML, CSS, or JavaScript compilation for every minor update. At its core, WordPress is an open-source CMS written in PHP and paired with a MySQL or MariaDB database engine. Open-source licensing under the GNU General Public License (GPLv2) grants organizations the freedom to run, modify, redistribute, and study the software's source code. This eliminates recurring licensing costs, mitigates vendor lock-in, and fosters a global ecosystem of developers, security researchers, and systems integrators.
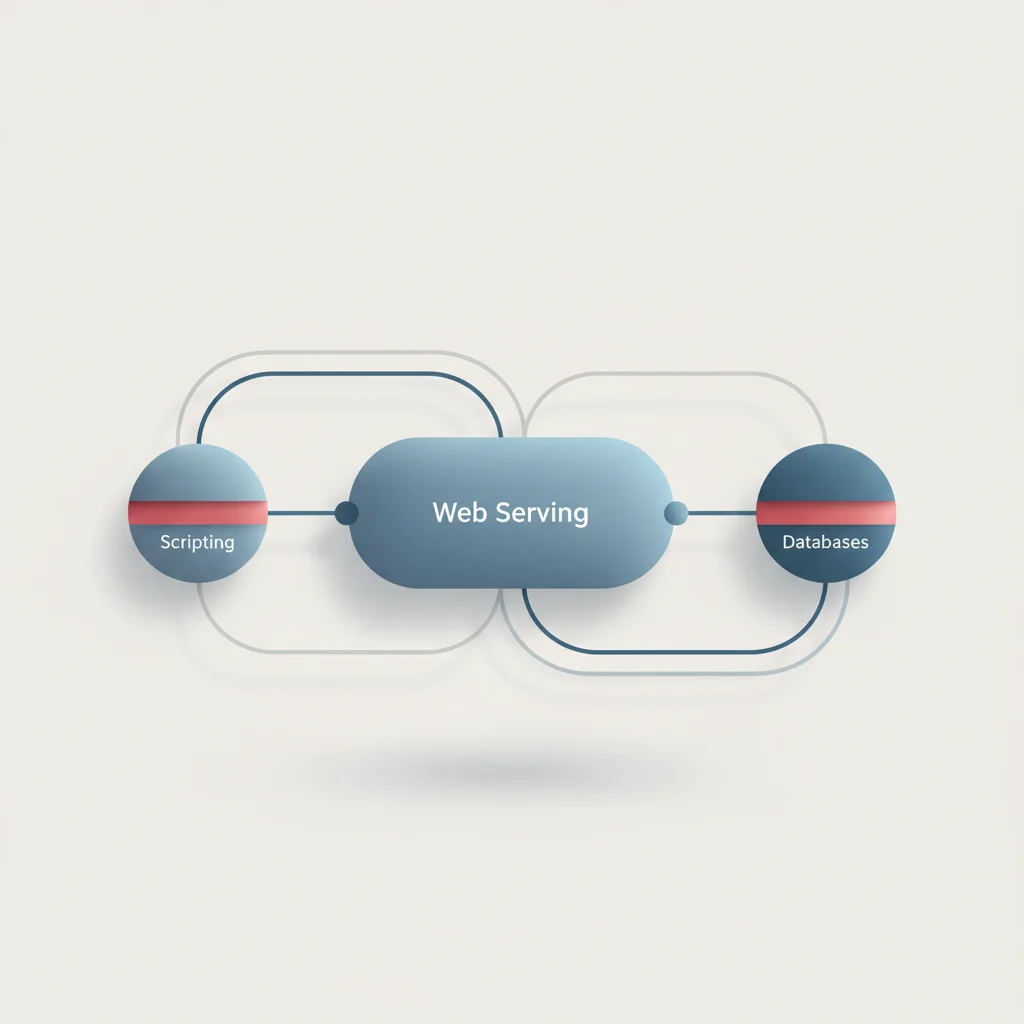
From an architectural standpoint, WordPress functions by decoupling content storage from presentation. Content—such as pages, posts, transactional metadata, and user privileges—resides systematically in relational database tables. When a visitor requests a URL, the web server (such as Nginx or Apache) routes the query through the PHP processor. PHP executes the core WordPress application files, communicates with the database to fetch the requested records, parses the active theme templates, and dynamically compiles standard HTML, CSS, and JavaScript. This dynamic rendering pipeline allows organizations to change their entire brand interface instantly without altering the underlying database records.
For enterprises, the open-source nature of WordPress translates to complete control over the application stack. Custom API integrations, head-less architecture deployments (using WordPress as a decoupled content repository serving front-end frameworks like React or Next.js), and precise database modifications are fully supported. The system’s extensibility is maintained through a structured system of hooks, filters, and REST API endpoints. This architecture allows developers to modify core behavior without tampering with core files, preserving a clear path for future security updates.
WordPress.org vs. WordPress.com: Making the Right Corporate Choice
A common point of confusion for organizations is the distinction between WordPress.org and WordPress.com. While they share the same foundational codebase, their hosting models, administrative capabilities, security responsibilities, and financial structures differ substantially. Choosing the incorrect model can restrict your website’s functionality, compromise brand consistency, or introduce unforeseen operational expenses.
WordPress.org refers to the self-hosted version of the software. Under this paradigm, your organization downloads the free core software files and installs them on a third-party server environment or an internal infrastructure. This grants unrestricted access to the source files, database tables, and server configurations. Businesses seeking custom application integrations, deep conversion rate optimization (CRO) testing, or compliance with stringent data protection frameworks (such as GDPR or KVKK) rely on self-hosted installations. However, this flexibility places the responsibility of server maintenance, automated backups, and siber security patches directly on your internal IT team or managed hosting provider.
Conversely, WordPress.com is a commercial, fully-managed Software-as-a-Service (SaaS) platform operated by Automattic. It provides the software as a pre-configured service, packaging hosting, subdomains, and baseline security into tiered subscription plans. While it lowers the technical barrier to entry, it restricts deep customization, third-party plugin integration, and advanced database access on lower-tier plans. For enterprises requiring complete control over their SEO strategies, performance optimization, and custom web design, the self-hosted WordPress.org path is the standard industry choice.
Technical Prerequisites for Optimal Performance

Web Hosting and Domain Name Requirements
The foundation of a reliable website deployment lies in its hosting environment and Domain Name System (DNS) configuration. Choosing a server solution must be guided by anticipated traffic volumes, database size, and performance criteria such as Time to First Byte (TTFB). For corporate environments, hosting generally falls into three main categories: Managed WordPress Hosting, Virtual Private Servers (VPS), and Dedicated/Cloud Infrastructure (such as AWS, Google Cloud Platform, or Microsoft Azure).
Managed WordPress hosting is tailored specifically for the platform's core architecture. These servers are pre-configured with proprietary server-side caching mechanisms (such as Redis object caching and Varnish), automatic core security updates, and daily isolated file system backups. VPS environments provide dedicated virtualized resources, granting system administrators root access to optimize the server stack manually. Large enterprises with highly complex application portfolios or high-concurrency traffic spikes typically utilize cloud infrastructure, leveraging autoscaling containers, Content Delivery Networks (CDNs), and load balancers to distribute global traffic efficiently.
The domain name functions as the human-readable address pointing to your hosting environment's IP address. Domain name registration should be handled through an ICANN-accredited registrar to secure ownership rights and prevent domain hijacking. Furthermore, setting up premium, distributed DNS providers is critical for mitigating DDoS attacks and minimizing latency. When a user requests your domain, the DNS resolver must translate the hostname to the server IP. Utilizing a high-performance DNS service ensures that this translation occurs in milliseconds, positively impacting your overall core web vitals and search visibility.
Server Environment: PHP and MySQL Database Standards
The operational efficiency of a WordPress instance is strictly tied to the versioning and configuration of its runtime environment. The software relies heavily on PHP as its executing language and MySQL or MariaDB as its relational database management system. Outdated software versions in these layers degrade performance, limit plugin compatibility, and expose the entire infrastructure to documented security vulnerabilities.
PHP execution variables must also be optimized within the server's @@CODE0@@ file. For instance, @@CODE1@@ should be set to at least @@CODE2@@ seconds, and @@CODE3@@ along with @@CODE4@@ should be set to @@CODE5@@ or higher. These values ensure that large media assets, extensive databases, and theme files can be processed without reaching execution thresholds that cause HTTP 500 error codes.
Security First: SSL Certificates and Environment Preparation
Before initializing any web-facing installation script, securing the data transmission channel is non-negotiable. An Secure Sockets Layer (SSL) or Transport Layer Security (TLS) certificate encrypts all transactional traffic between the user's browser and the hosting server. This prevents man-in-the-middle attacks, ensures user data privacy under frameworks like GDPR, and satisfies search engine indexing requirements.
Modern hosting setups allow system administrators to provision free, automated domain validation certificates via Let's Encrypt. For enterprise sites managing complex multi-regional setups or transactional customer portals, wildcard SSL/TLS certificates or Extended Validation (EV) options are frequently employed. Once provisioned, the web server configuration must be modified to enforce HTTPS globally. This is accomplished by writing permanent redirection rules (HTTP 301 redirects) within the web server config files or routing traffic through a reverse proxy service.
Preparing the server directory structure is the final prerequisite. The target root directory—typically named @@CODE0@@, @@CODE1@@, or @@CODE2@@—must have correct POSIX file permissions applied. Directories should be configured to permission level @@CODE3@@ (read, write, execute for owner; read and execute for group and others) and files to 644 (read and write for owner; read-only for others). This ensures that the web server user can read files and execute scripts, while preventing arbitrary write access to public-facing directory paths.
How to Install WordPress: Deployment Methods
Method 1: Automated Installation via cPanel (Recommended for Efficiency)
For most standard web configurations, utilizing an automated software installer represents the most time-efficient deployment path. Hosting control panels, primarily cPanel, typically ship with application installers such as Softaculous, Installatron, or proprietary tools developed by managed hosts. These automated tools streamline the database creation, file download, and directory permission configurations into a unified visual wizard.
To deploy using cPanel:
Authenticate to your hosting control panel.
Locate the "Software" or "Application Installer" section and select the WordPress core package.
Click "Install Now" to initialize the configuration interface.
Define the protocol as
https://and choose the target domain name. If installing directly to the root, leave the "In Directory" parameter entirely blank.Provide administrative configuration parameters, such as a secure administrator email and a complex, randomly generated password.
Under advanced options, customize the database name and change the default database prefix (e.g., from @@CODE0@@ to a unique alphanumeric combination like @@CODE1@@) to mitigate simple SQL injection vulnerabilities.
Click "Install" to allow the system to fetch the latest stable core release, unpack the directory structure, create the relational database, and generate the required configurations.
This automated process typically concludes in under three minutes, delivering a fully operational, live installation. While highly convenient, system administrators must still verify that the installer has applied the correct PHP version settings and that directory permissions conform to secure standards.
Method 2: Manual Installation via FTP (Required for Advanced Control)
When deploying on customized virtual instances, complex private networks, or environments where standard control panels are absent, executing a manual installation via File Transfer Protocol (FTP) or Secure File Transfer Protocol (SFTP) is mandatory. Manual installation gives the systems engineer direct control over every server-side variable, from the absolute file paths to the custom database configurations.
This method requires an FTP/SFTP client such as FileZilla, Cyberduck, or WinSCP, along with direct administrative access to the hosting server's file system and database control interface (typically phpMyAdmin or command-line MySQL). SFTP is heavily preferred over standard FTP, as it encrypts both the transmission credentials and the data packets, preventing credentials from being intercepted in plain text.
The core advantage of manual installation is its transparency. It ensures that no pre-packaged host customizations or unwanted advertising plugins are injected into the database. Developers can selectively configure core structures, organize file layouts, and implement security measures before the application ever connects to a live database.
Method 3: Local Server Deployment (For Testing and Development)
Deploying a website directly on a live production server is not recommended for custom engineering, theme development, or performance testing. Instead, professional development workflows utilize a local server environment hosted entirely on a developer’s physical machine. Local installations run isolated from the public web, removing the latency of remote networks and allowing rapid troubleshooting of custom code.
To establish a local WordPress environment, developers rely on specialized tools such as LocalWP, DevKinsta, or generic local development packages like XAMPP, MAMP, or Docker-based stacks. LocalWP, for example, streamlines this process by packaging Nginx, PHP versions, and MariaDB instances into a clean user interface. It allows developers to swap between PHP versions (e.g., toggling between 8.1 and 8.3) instantly to check for runtime compilation errors or deprecated function warnings.
For advanced development teams, leveraging a localized containerization tool like Docker or Docker Compose provides the highest level of environmental consistency. By defining the exact operating system, PHP configurations, and database version within a docker-compose.yml file, teams can guarantee that every developer works on an identical copy of the production environment. This practice eliminates "it works on my machine" development bugs, laying a stable foundation for structured continuous integration and continuous deployment (CI/CD) pipelines.
Step-by-Step Manual Installation Guide
Step 1: Downloading the Core Files
To begin a manual deployment, the verified core software package must be retrieved directly from the official repository. Avoid downloading packages from third-party mirrors, forums, or theme marketplaces, as these can easily contain malicious supply-chain code injections, backdoors, or outdated versions.
The verified file source is:
Official URL:
https://wordpress.org/download/
Download the package in either @@CODE0@@ or @@CODE1@@ format. The @@CODE2@@ archive is generally easiest for Windows-based systems, while @@CODE3@@ is ideal for Linux terminal operations. If you have shell access to your web server via SSH, you can bypass downloading the archive locally and fetch the latest package directly to the server directory using the following terminal commands:
cd /var/www/html
wget https://wordpress.org/latest.tar.gz
tar -xzvf latest.tar.gz
mv wordpress/* .
rmdir wordpress
rm latest.tar.gz
These terminal commands navigate to the web server's public folder, fetch the latest official compressed tarball, extract its contents directly into the current directory, clean up the empty source directory, and delete the downloaded archive file. This is the fastest, cleanest way to retrieve clean source files.
Step 2: Creating a Secure MySQL Database and User
Once the core files are positioned on the web server, you must establish a relational database environment to store the website content. This database initialization is typically done through phpMyAdmin or via a database creation wizard inside your hosting control panel. Alternatively, you can use the command-line interface (CLI) to configure it.
If using phpMyAdmin:
Log in to the database interface and select the "Databases" tab.
Enter a unique, non-obvious database name. Avoid naming it @@CODE0@@ or @@CODE1@@ to reduce automated target discovery. Select
utf8mb4_unicode_cias the collation method to fully support modern UTF-8 characters and multi-language scripts.Click "Create."
Next, a dedicated database user with restricted permissions must be provisioned. Never configure your application to use the master administrative database user (such as @@CODE0@@ or @@CODE1@@). To create a secure database user in phpMyAdmin:
Navigate to the "Privileges" tab and select "Add user account."
Define a unique username and select
localhostas the host limit parameter to prevent external servers from connecting directly to your database.Generate a cryptographically strong database password (at least 24 random characters).
Under "Database for user account," check "Grant all privileges on database [YourDatabaseName]."
Click "Go" to write the new user permissions to the system database.
CREATE DATABASE secure_db_name CHARACTER SET utf8mb4 COLLATE utf8mb4_unicode_ci;
CREATE USER 'secure_user_name'@'localhost' IDENTIFIED BY 'Strong_Random_Password_Here';
GRANT SELECT, INSERT, UPDATE, DELETE, CREATE, DROP, ALTER ON secure_db_name.* TO 'secure_user_name'@'localhost';
FLUSH PRIVILEGES;
This SQL script provides a direct, highly secure database setup by establishing the database with modern character sets, provisioning a localized user account, granting only the necessary application-level database privileges, and refreshing the system’s permissions memory to apply changes immediately.
Step 3: Configuring the wp-config.php File (Caution Required)
The core configuration file, @@CODE0@@, acts as the operational bridge between the static PHP files on your server and the dynamic relational database. It contains your database authentication details, directory definitions, and vital security salts. The core download archive does not include a pre-configured @@CODE1@@ file; instead, it provides a template file named wp-config-sample.php.
To configure this file manually:
Rename @@CODE0@@ to @@CODE1@@ within your root file directory.
Open the file in a secure code editor (such as VS Code, Notepad++, or nano) and locate the database definition block.
Replace the placeholder database credentials with the exact values you configured in the previous step:
define( 'DB_NAME', 'secure_db_name' );
define( 'DB_USER', 'secure_user_name' );
define( 'DB_PASSWORD', 'Strong_Random_Password_Here' );
define( 'DB_HOST', 'localhost' );
define( 'DB_CHARSET', 'utf8mb4' );
define( 'DB_COLLATE', '' );
Next, update the "Authentication Unique Keys and Salts" block. These keys encrypt user cookie data and active sessions, preventing session hijacking. Navigate your web browser to the official automated salt generator at
https://api.wordpress.org/secret-key/1.1/salt/. Copy the random hashes generated by the server and paste them directly over the default placeholders.Finally, scroll down to the @@CODE0@@ variable. Change this value from the default @@CODE1@@ to a customized prefix (e.g., @@CODE2@@). This custom prefix secures the database tables against target discovery scripts that query the default @@CODE3@@ or
wp_poststables. Save the file.
Step 4: Uploading Files to the Server Root
If you downloaded and configured the files on your local machine, the complete, customized file directory must now be securely transferred to your remote web server. This file transfer is performed using your configured SFTP client.
To initiate the transfer:
Open your SFTP client and connect to your hosting server using your secure system user credentials.
In the local directory panel, navigate to the extracted folder containing your modified
wp-config.phpfile.In the remote directory panel, locate the server's public web directory (e.g., @@CODE0@@ or @@CODE1@@).
Select all core directories (@@CODE0@@, @@CODE1@@,
wp-includes) and root files, right-click, and select "Upload."Monitor the file transfer queue closely. Depending on your network upload speed and the server’s packet limits, transferring these files may take several minutes. Ensure no files fail during transfer, as a missing core file can cause execution errors.
Once the upload is complete, review the files on the server to verify that the file names, directory structures, and sub-folders match the local setup exactly. Ensure there are no nested folders (such as uploading an extra @@CODE0@@ folder inside @@CODE1@@), which would change the website's URLs.
Step 5: Running the Installation Script
With the database established, files uploaded, and configurations pointing to the correct systems, the final step is to run the automated installation script. This script executes the database migrations, builds the required tables, and configures the default application settings.
To execute the installer:
Open a secure web browser and navigate to your website's main domain (e.g., @@CODE0@@). If your files are positioned correctly, the browser will automatically redirect to the initialization script at @@CODE1@@.
Select your preferred administrative language from the list and click "Continue."
On the site details page, input your "Site Title." Note that this can be easily updated in the settings dashboard later.
Input your "Username." Do not use generic terms like @@CODE0@@, @@CODE1@@,
root, or your domain name. These are the primary targets of brute-force attacks. Create a unique, descriptive administrative username.Generate a complex, strong password. The installer will automatically generate a highly secure administrative password; copy and save this to an enterprise password management tool.
Input a valid administrative email address. This email will receive critical server alerts, plugin updates, and password reset notifications.
Under "Search Engine Visibility," check or uncheck the index options. If your site is currently in development and you do not want search engines indexing partial pages, check "Discourage search engines from indexing this site." Remember to uncheck this once the site is officially ready for public launch.
Click "Install WordPress."
Within a few seconds, the script will write the default structural tables and options to your SQL database. Once complete, a success screen will appear. You can then click "Log In" to access your new admin dashboard at https://example.com/wp-login.php.
Summary of the step-by-step technical procedures required to manually deploy a clean WordPress site. Fetch the official, clean zip file from the primary download page at wordpress.org. Create a clean relational SQL database with secure, restricted local user access. Rename the configuration template, insert secure database credentials, and generate unique security salts. Use a secure SFTP connection to upload all core directories and files into the server's public root folder. Navigate to the root domain and run the browser-based installation script to generate the database schema.Chronological Manual Installation Steps
Download Core
Establish Database
Configure wp-config
Upload to Root
Run the Script
Post-Installation: Critical Security and Configuration Steps

Setting Up Strong Administrative Credentials
Securing the administrative dashboard is your first line of defense against compromise. Automated brute-force scripts crawl the web constantly, attempting to guess login credentials on common paths. To mitigate this risk, you must configure strong, unique login parameters.
Avoid simple, human-predictable passwords. Administrative passwords should be generated using secure algorithms, ensuring they are at least 16 to 24 characters long and include an array of uppercase letters, lowercase letters, numbers, and special symbols. Implementing an enterprise-grade password vault within your organization ensures that these complex strings are stored securely and never shared via unencrypted channels.
Furthermore, access control should be strengthened by implementing Multi-Factor Authentication (MFA). By installing verified security plugins or routing logins through an enterprise single sign-on (SSO) gateway, administrators must verify their identity with a time-based token on a physical mobile device before gaining access. This step secures administrative sessions even if login credentials are accidentally leaked.
Adjusting Permalink Structures for SEO
The default permalink structure generated by a fresh WordPress installation is not optimized for search engines or human readability. It often formats URLs using query variables, such as https://example.com/?p=123. This format fails to provide semantic context to search crawlers and typically degrades click-through rates from search results pages.
To optimize the URL structure:
Navigate to the admin dashboard, hover over "Settings," and select "Permalinks."
Under "Common Settings," choose "Post name." This updates the URL structure to a clean format, such as
https://example.com/sample-post/.Click "Save Changes."
Updating this setting forces the application to automatically generate rewrite rules. On Apache-based servers, these rules are written to your .htaccess file. On Nginx-based servers, you must ensure that your host’s Nginx server block configuration contains rewrite directives to handle beautiful URLs. This step ensures that all server-side requests are correctly routed through the root index controller, preventing broken links and HTTP 404 errors.
# Nginx rewrite block required for beautiful permalinks
location / {
    try_files $uri $uri/ /index.php?$args;
}
Integrating this specific block into your Nginx configuration guarantees that search engine spiders, automated crawlers, and human users are seamlessly directed to the dynamically generated post templates, optimizing crawl efficiency and page speed.
Deleting Default Files to Prevent Vulnerabilities
A fresh installation contains several default files and assets that are not required for production environments. Leaving these default templates, themes, and configuration files on your server increases your overall attack surface by exposing version numbers or providing avenues for remote file inclusion.
To clean up your environment:
Authenticate to your server via SFTP or your hosting file manager.
In your root web directory, delete the @@CODE0@@ and @@CODE1@@ files. These files contain details about your core system version, which malicious scanners look for.
Open the
/wp-content/themes/directory and remove all default themes except the currently active one and one backup default theme. This keeps your server clean and minimizes code audit overhead.Navigate to @@CODE0@@ and delete the pre-packaged @@CODE1@@ plugin.
In your web root folder, double-check that the
wp-config-sample.phptemplate has been completely deleted. This prevents malicious actors from extracting server configurations or pathways.
Frequently Asked Questions
Is WordPress completely free for commercial use?
Yes, WordPress is licensed under the GPLv2, which allows businesses to download, modify, and host the software for any commercial purpose without paying license fees. However, operational expenses such as web hosting, domain registration, and premium plugins will still apply.
Do I need coding experience to manage a WordPress site?
Coding is not required for daily content management, as the Gutenberg block editor allows for visual layout building. However, performing manual server installations, troubleshooting database connections, and building custom PHP themes do require baseline technical skills.
How can I ensure my database connections remain secure?
Restrict database user privileges, generate high-entropy database passwords, ensure your database host points exclusively to localhost, and modify your default database prefix to prevent targeted SQL injection attacks.
What is the difference between PHP 7.4 and PHP 8.x for WordPress?
PHP 8.x features modern compilation engines that execute scripts significantly faster, reducing server CPU utilization and reducing page load times, while old versions like PHP 7.4 are deprecated and expose sites to unpatched vulnerabilities.
Can I change my WordPress website's installation directory after installing it?
Yes, you can move your core files to a different directory. However, you must update the site address and home URL variables within the dashboard or your configuration file to prevent broken routing and styling issues.
Why am I seeing an Error Establishing a Database Connection screen?
This warning indicates that your server is unable to authenticate with your database. Double-check your database name, username, password, and host parameters inside your configuration file to resolve this issue.
Should I use a automated installer or install WordPress manually?
Use an automated installer for speed and standard deployments on managed hosts. Choose a manual installation when you require absolute control over file structures, custom database configurations, or when deploying to custom virtual servers.
How do I enforce secure HTTPS connections on my new installation?
First, install an SSL certificate on your hosting server. Then, update your site and home URLs to use the https prefix in your settings, and add redirect rules to your configuration file to route traffic to HTTPS.